Here is a collection of frequently asked questions and the answers, if you run into some issue when using Splashtop Connector, you can take a look.
Why do I get a black screen when connecting to a Windows Server 2012 through RDP?
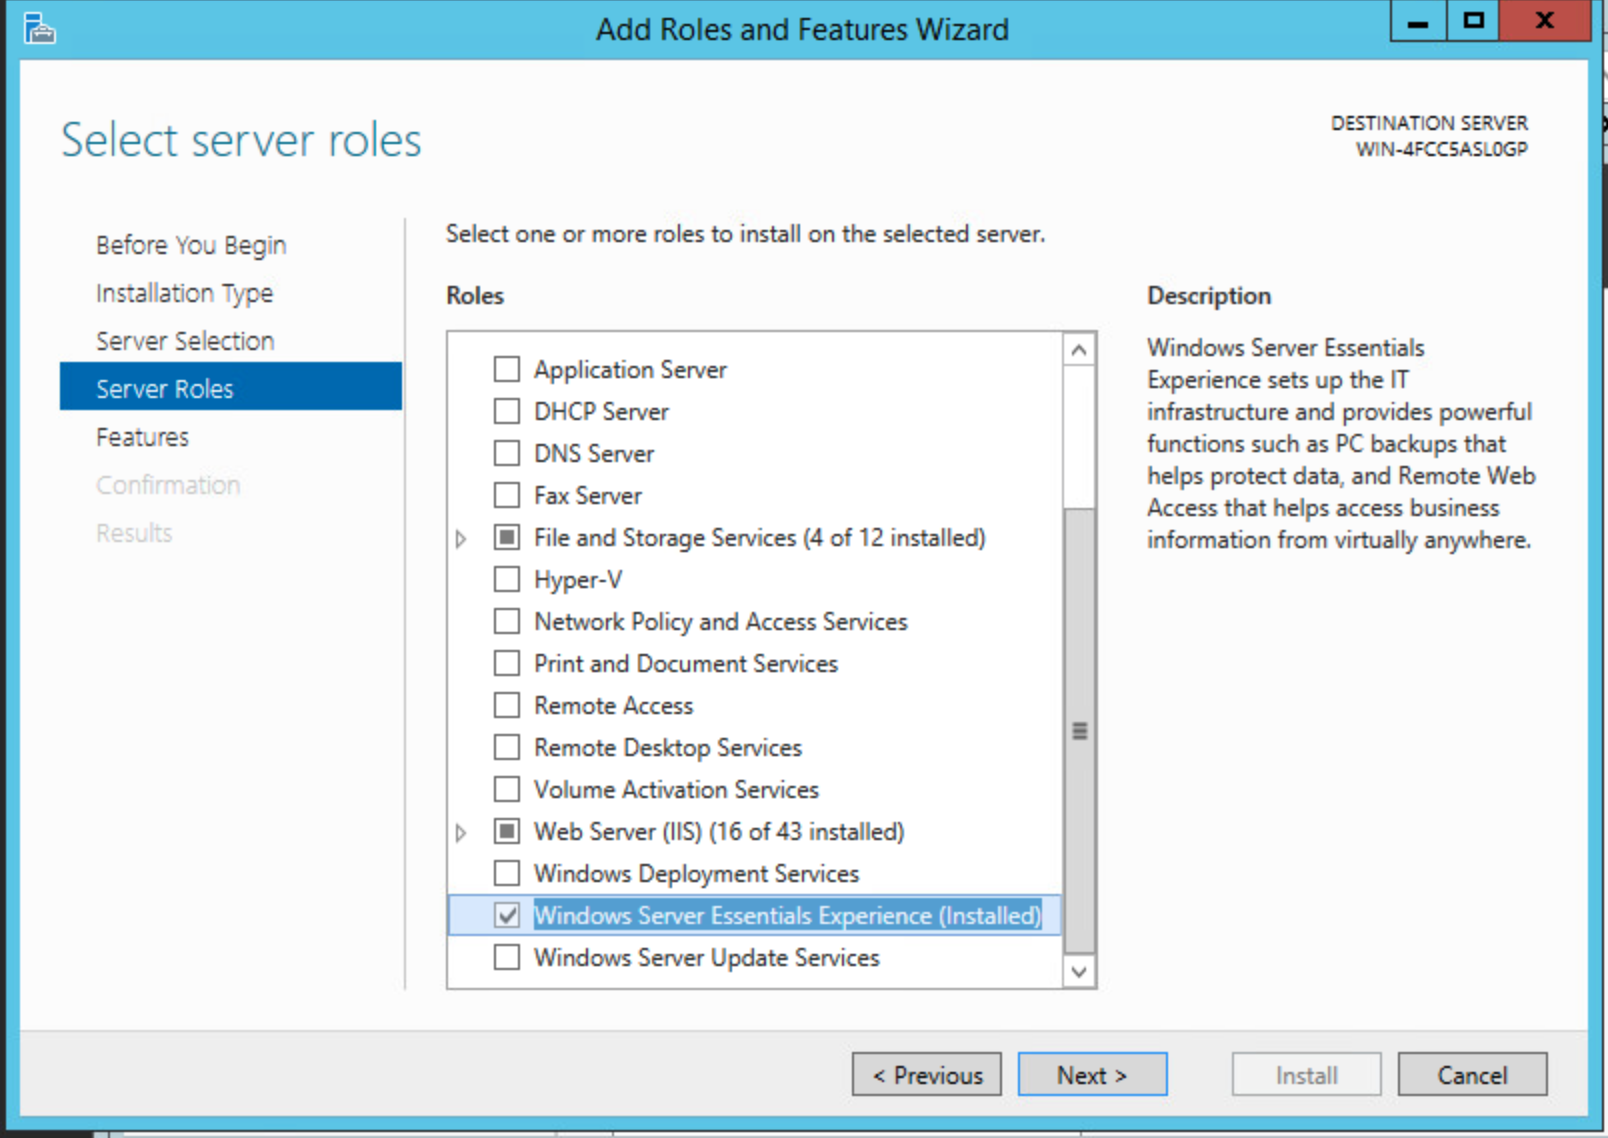
A: If you are connecting to Windows Server 2012, and get a black screen, it's very possible that Windows Server Essential Experience has not been enabled on the server. Please refer to the following steps to enable it.
- Log on to your server as a local administrator.
- Open Server Manager, and then click Add Roles and Features.
- In Select server roles, select the Windows Server Essentials Experience role. In the dialog box, click Add Features, and then click Next.
- In Features, click Next.
- Review the Windows Server Essentials Experience role description, and then click Next.
- In the pages that follow, click Next, and then on the confirmation page, click Install.
- After the installation is complete, Windows Server Essentials Experience should be listed as a server role in Server Manager.
- In the flag notification area in Server Manager, click the flag, and then click Configure Windows Server Essentials.
- (Optional) Change the server name if needed.
ImportantYou cannot change the server name after you have configured Windows Server Essentials.
- Follow the wizard to configure Windows Server Essentials as described in the Deploying Windows Server Essentials section.
- Follow the wizard to configure Windows Server Essentials as described in the Deploying Windows Server Essentials section.
Do I have to have Splashtop Streamer installed on the machine in order to install the Splashtop Connector? How about the RDP machines?
A: No, it is not required to install the Splashtop Streamer on any machines.
Can I create a profile for the same computer that the Splashtop Connector is running on?
A: Yes.
Can I have two users simultaneously accessing the same OS user profile?
A: Like standard RDP limitations, two users cannot simultaneously access the same OS user profile via RDP.
Can I access the same machine via both Splashtop Streamer and RDP/Splashtop Connector, simultaneously?
A: This is possible, but it may depend on your use case. By default, Splashtop Streamer connections connect to the machine’s console session. If a user logs into the console session, RDP connections are disconnected, and vice versa – this is an RDP limitation. However, you may connect to the Splashtop Streamer and use the Terminal Session icon to view active RDP sessions. This does not give the ability to have a separate desktop session.
Which in-session features are supported? Are the same features from standard Splashtop Streamer connections supported?
A: Text and File copy-and-paste are both supported during these RDP sessions. File copy-and-paste is only support from the Windows Business App client. Features such as remote print, remote command, and others from standard Splashtop Streamer connections are not supported at this time.
How to automatically log-off disconnected user session on Windows?
A:Many times users connect to remote Windows systems, do work, and close the remote session without properly log off the account. In that case, multiple applications, which are still running with that login session uses system resources. Sometimes it causes a slow response of our servers and creates pain for us. So this will be good to auto log off disconnected sessions from the Windows system.
This tutorial will help you to log all the disconnected remote sessions on the Windows system. This tutorial has been tested with Windows Server 2019.
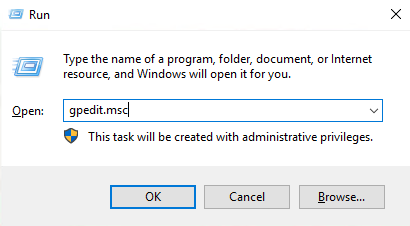
1. Open the ‘Group Policy Editor‘ on your server. Start run window by pressing “Win + R” and typegpedit.mscon run window.
2. Navigate to the following location as the below given location
  Local Computer Policy
   =>  Computer Configuration
     =>  Administrative Templates
	=>  Windows Components
          =>  Remote Desktop Services
            =>  Remote Desktop Session Host
              =>  Session Time Limits
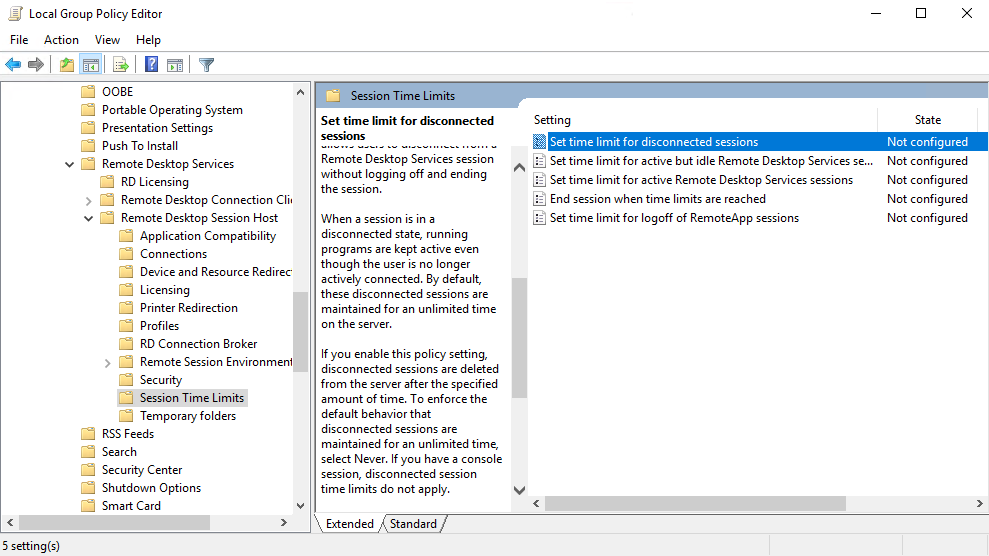
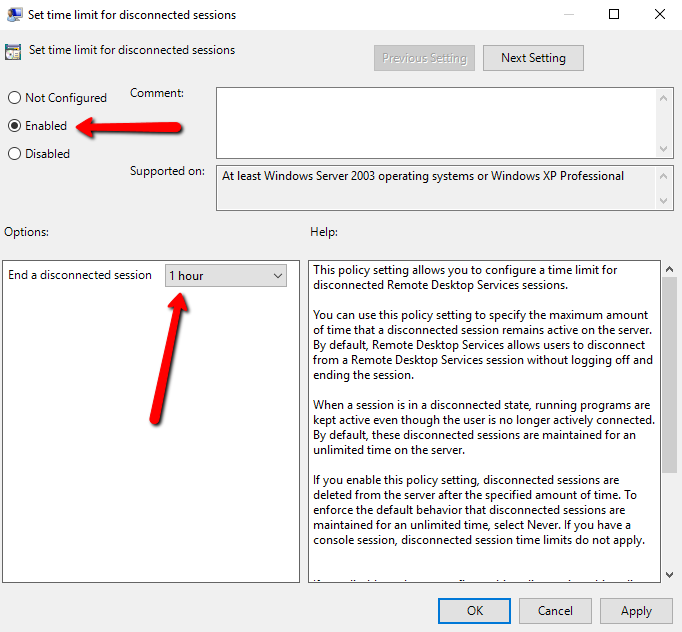
3.Double click on “Set time limit for disconnected sessions” to open it. By default, it is configured a ‘Not configured. Change this to ‘Enabled. Now you will see an option “End a disconnected session” in the lower-left side. Set this value to the desired time.